

Chapter 13: Where Angels Fear to Tread Walkthrough for Final Fantasy 7 Rebirth (FF7 Rebirth)
This page contains a complete walkthrough and guide for Chapter 13: Where Angels Fear to Tread in the Final Fantasy 7 Rebirth (FF7 Rebirth) including all party members (playable characters), obtainable items, enemies and bosses encountered, and strategies to clear the first main story section of the game.
Chapter 13: Where Angels Fear to Tread Walkthrough Overview
Party Members
| Name | Availability |
|---|---|
| Cloud Strife |
Open Exploration (before entering Temple of the Ancient), Temple of the Ancients Parts 1, 2, 4, and 6. |
| Aerith Gainsborough |
Open Exploration (before entering Temple of the Ancient), Temple of the Ancients Parts 1, 3, 5, and 6. |
| Tifa Lockhart |
Open Exploration (before entering Temple of the Ancient), Temple of the Ancients Parts 1, 2, 4, and 6. |
| Barret Wallace |
Open Exploration (before entering Temple of the Ancient), Temple of the Ancients Parts 1, 2, 4, and 6. |
| Red XIII |
Open Exploration (before entering Temple of the Ancient), Temple of the Ancients Parts 1, 3, 5, and 6. |
| Yuffie Kisaragi |
Open Exploration (before entering Temple of the Ancient), Temple of the Ancients Parts 1, 3, 5, and 6. |
Final Fantasy 7 Rebirth Playable Characters List and Guide
Obtainable Items
| Item | Location |
|---|---|
| Ramuh (QB Card) | Gold Saucer (After beating Lidrehl in Queen’s Blood) |
| Diabolic Variant (QB Card) | Costa del Sol (After beating Riana in Queen’s Blood) |
| Emerald Witch (QB Card) | Shinra Manor (After beating Vincent in Queen’s Blood) |
| Shadowblood (QB Card) | Gongaga Ruins (After beating Shadowblood Queen in Queen’s Blood) |
| Mist Mega Potion x2 | Temple of the Ancients |
| Giga Potion x2 | Temple of the Ancients |
| Slipstream Saber (Cloud Weapon) | Temple of the Ancients |
| Hi-Ether | Temple of the Ancients |
| X Potion | Temple of the Ancients |
| Whistlewind Scarf (Accessory) | Temple of the Ancients |
| Giga Potion | Temple of the Ancients |
| Mythril Ore | Temple of the Ancients |
| EXP Up Materia | Temple of the Ancients |
| Cetran Bangle | Temple of the Ancients |
| Jarngreipr (Tifa Weapon) | Temple of the Ancients |
| Cosmotite Ore | Temple of the Ancients |
| Giga Potion x2 | Temple of the Ancients |
| Hi-Ether | Temple of the Ancients |
| Gambanteinn (Aerith Weapon) | Temple of the Ancients |
| Elixir | Temple of the Ancients |
| Steadfast Block Materia | Temple of the Ancients |
| Cetran Armband (Armor) | Temple of the Ancients |
| Battle Cry (Barret Weapon) | Temple of the Ancients |
| Circlet (Accessory) | Temple of the Ancients |
| Revival Materia Earrings (Accessory) | Temple of the Ancients |
| Mist Giga Potion | Temple of the Ancients |
| Brisingamen (Red XIII Weapon) | Temple of the Ancients |
| Cetran Armlet (Armor) | Temple of the Ancients |
| Astral Material | Temple of the Ancients |
| Cetran Bracer (Armor) | Temple of the Ancients |
| Fuma Shuriken (Yuffie Weapon) | Temple of the Ancients |
| Elixir | Temple of the Ancients |
Enemies
| Enemy | Weakness |
|---|---|
| Shinra Trooper | Fire |
| 2-C SOLDIER Operator | Fire |
| Blight Frog | Ice |
| Cthonilizards | Ice |
| Ancient Dragon | None |
| Berserker Bee | Wind |
| Panthera Protector | Lightning |
| Floating Death | None |
| Kelmelzer | None |
| Hecteye | Varies |
| Moss-Grown Adamantoise | Fire |
Final Fantasy 7 Rebirth Enemies List: Weaknesses and Obtainable Items
Bosses
| Enemy | Weakness |
|---|---|
| Red Dragon | Ice |
| Rude and Reno | Wind (Rude), Fire (Reno) |
| Demon Gate | None |
Chapter 13 Odd Jobs (Side Quests)
| Side Quest | Location |
|---|---|
| Can’t Stop, Won’t Stop | Gold Saucer |
Final Fantasy 7 Rebirth Odd Jobs (Side Quests) List
Chapter 13 Bonds of Friendship Dialogue Choices and Answers
There are no Bonds of Friendship dialogue events in this chapter.
Final Fantasy 7 Rebirth Bonds of Friendship Dialogue Answers List
Chapter 13 Story Beat Relationship Events
There are no story beat events to increase relationships with any party member in this chapter.
Final Fantasy 7 Rebirth All Chapter Relationship Events List
Chapter 13 Walkthrough Summary
Open Exploration
| 1 | Upon reaching Chapter 13, it is recommended to clear any remaining side quests, mini games, Combat Simulator missions, and other optional activities (including those that become available in this chapter) before proceeding further into the main story. You can also try collecting any remaining Queen’s Blood cards by clearing Queen’s Blood challenges or by defeating the last few players that appear around the game’s various regions.
Lidrehl is found in Gold Saucer and will give you the Ramuh card upon beating him. You can also head to Costa del Sol to challenge Riana to get the Diabolic Variant card. Vincent himself can be challenged in Queen’s Blood. He is found in Shinra Manor and will give you the Emerald Witch card. The game’s final Queen’s Blood players to beat, the Shadowblood Queen, can also be challenged by heading to Gongaga Ruins. Beating her will reward you with the Shadowblood Queen card. Finally, you can also get the Ultimate Party Animal Card from the Shinra Middle Manager during the Can’t Stop Won’t Stop Odd Job side quest at the Gold Saucer. Note that this optional quest only becomes available after you have finished all 35 side quests up to this point and have cleared all mini games in Gold Saucer. |
|---|---|
| 2 | You can also try completing all World Intel objectives that you have not yet done up to this point, especially Protorelics which will unlock the Gilgamesh secret boss fight. Beating this optional boss will reward you with the Gilgamesh summon materia as well as access to new Combat Simulator missions. |
| 3 | Lastly, it is recommended to clear the Pirate’s Treasure side mission (unlocked via the item you get from the chest in Costa del Sol in Chapter 12) which requires you to find the 4 Pirate Grotto’s around the Meridian Ocean region. Doing so will allow you to craft the Corsair’s Compass (accessory) and unlock new Combat Simulator missions to do. |
| 4 | To proceed with the main story, ride the Tiny Bronco to Northwood to the north of Meridian Ocean region. |
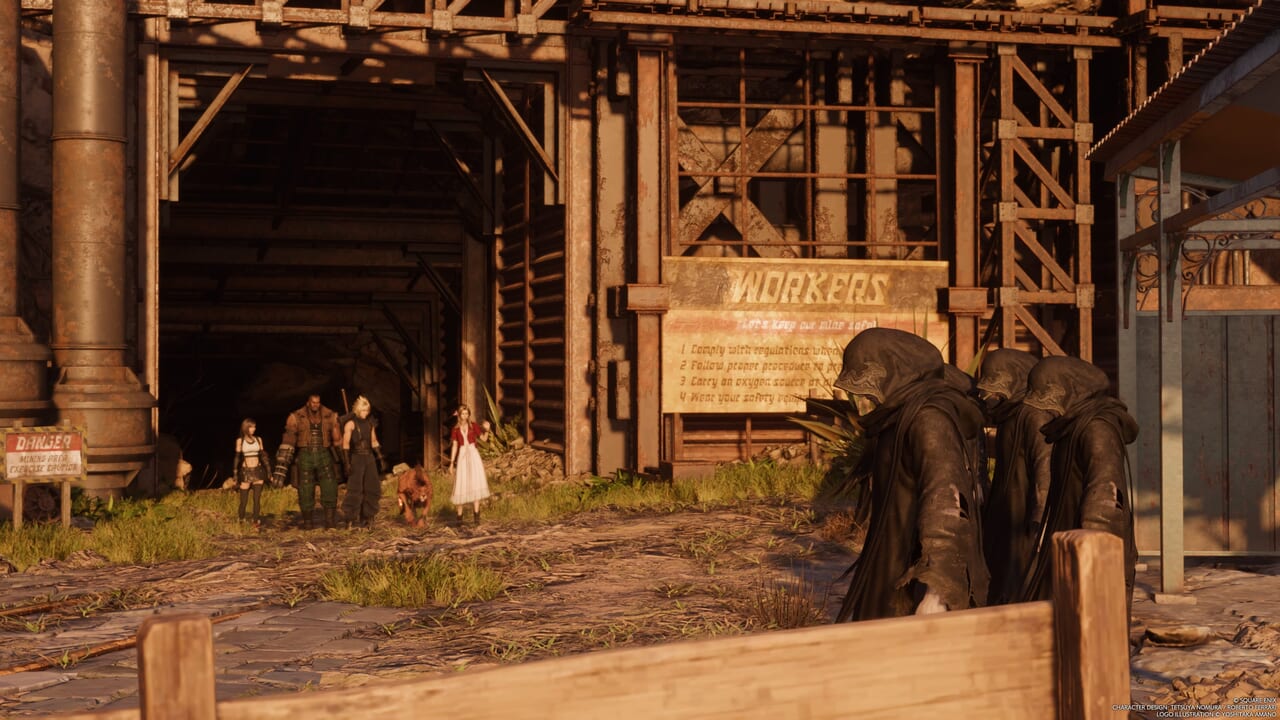
Northwood – Temple of the Ancients Part 1
| 1 | Once you arrive at the dock, move forward towards the rest stop. Use it if you need to and then head north to the forest. |
|---|---|
| 2 | Watch the cutscene. Afterwards, approach the bridge. Before crossing, head down to the lower platform to find a chest containing Mist Mega-Potion x2. |
| 3 | Head back up and cross the bridge. Take down the Shinra troops there. |
| 4 | Follow the main path again to reach the Temple of the Ancients. |
| 5 | Once you are inside, move ahead through the door. Then, take out the enemies in the room and go through another door. |
| 6 | In the next area, follow the path that goes to the right and open the nearby chest to get Giga Potion x2. |
| 7 | Continue along the path and take out the enemies here. |
| 8 | Go up the stairs to the Rubystar Chamber. You must use the chamber to alter the gravity in the temple. For the Rubystar Chamber, shift the gravity upwards. |
| 9 | Continue moving along the path and take out the Ancient Dragons. Afterwards, go forward again and turn right to find a wall with vines that you can climb. |
| 10 | Go up the vines and open the chest ahead to get Slipstream Saber (Cloud weapon). |
| 11 | Head back down the previous area and go left to reach the Jadestar Chamber. Here, shift the gravity downward. |
| 12 | Move to the next platform. Then, go to the southwest edge to find a chest with Hi-Ether. |
| 13 | From here, follow the quest marker and take out the enemies in the next area. When the path splits between the stairs on the right and a path on the left leading to a platform with some enemies. Take the latter and clear out the enemies here. Then, open the chest nearby to get X-Potion. |
| 14 | Backtrack to the previous area and take the stairs now to the Azurestar Chamber. In this room, shift gravity upward to to reach the chest containing Whistelwind Scarf (accessory). Then, shift gravity again to the right. |
| 15 | Go left and climb up the wall. Then, take out the Shinra troopers in the area. |
| 16 | From here, go up to the large block and push it southeast next to the ledge. Then, use the block to climb up to the upper level. |
| 17 | As you move forward, you will see a waterfall in the distance. Before going further, head to the path that open to the left to find a chest with Giga Potion. Then, head for the waterfall and jump down. |
| 18 | At the bottom of the waterfall, surface from the water. Then, head to the nearby platform by going around to the north. Open the chest here to get Mythril Ore. |
| 19 | Continue following the quest marker while taking out enemies along the way. |
| 20 | When you reach the junction with the two star chambers, head for the Amberstar Chamber first. Shift the gravity upward. Then, move forward along the path to reach the upper level. |
| 21 | Take out the Ancient Dragons. Then continue forward to get EXP Up Materia. |
| 22 | Backtrack to the junction. This time, head to the Mauvestar Chamber and shift gravity downward. Go up the climbable vines nearby. Then, take out more enemies in the upper level. Afterwards, open the chest ahead to get Cetran Bangle (armor). |
| 23 | Head back down the vines and shift gravity in the Mauvestar Chamber upward. Then, head for the quest marker again. |
| 24 | Take out the Shinra troops in the next area and continue advancing. |
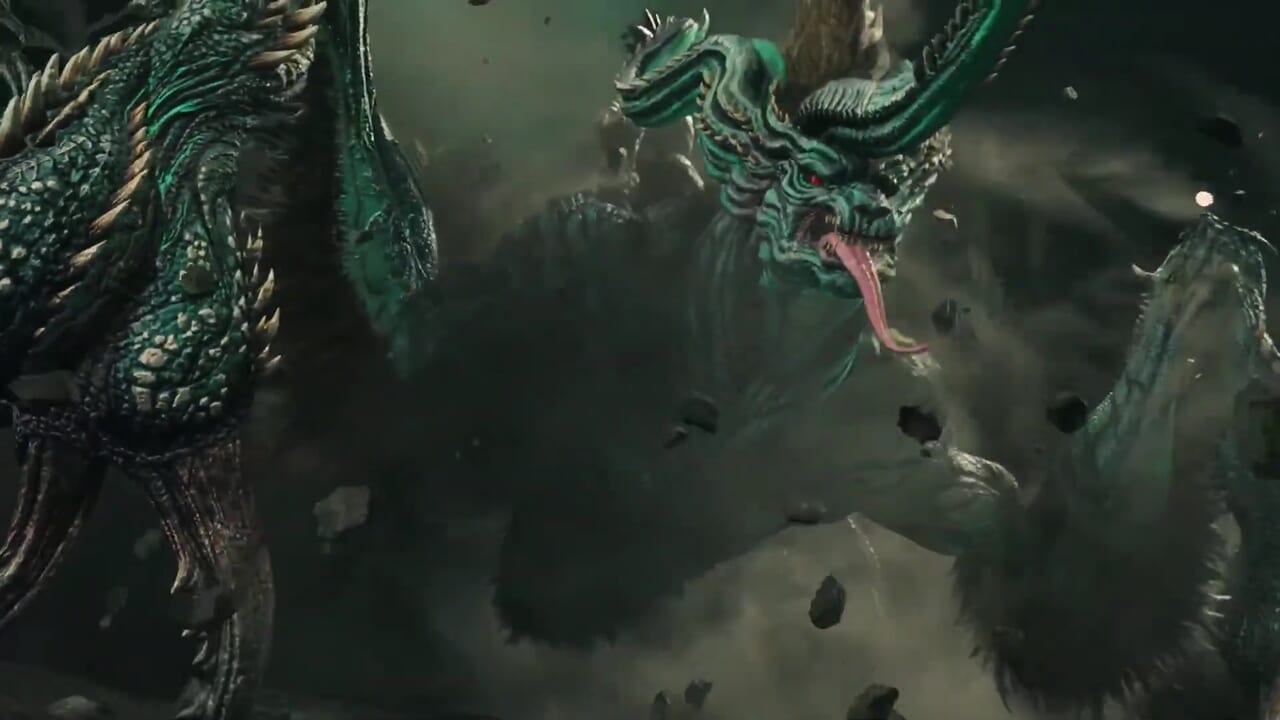
| 25 | Use the rest stop to heal the party’s HP and MP. Then, move forward and prepare to battle Red Dragon. |
| 26 | Red Dragon is weak to ice so having access to ice spells will let you build its stagger gauge faster.
As usual, it is recommended to maximize spell damage by having Aerith apply Arcane Ward. This allows you to take out a good chunk of Red Dragon’s HP when it is staggered. Focus on attacking Red Dragon’s head to increase the duration at which it can be pressured. Once the boss flies upward to the ledge above the arena, it will gain a targetable chest body part. Switch your focus on this part to weaken its Crimson Breath attack and prevent a massive area on the floor from being set on fire. When Red Dragon sets the pillars on fire, attack them to bring them down on the boss. This will pressure the boss, giving you some time to get in a few good hits before it can recover. For avoiding damage from the boss’ Flamethrower move, hide behind the pillars if you can. Finally, the Red Dragon will start to attack more often in the air. Bombard it with ranged spells and abilities. Once you force it to the ground and becomes staggered, unload on it with Limit Breaks if they are usable. |
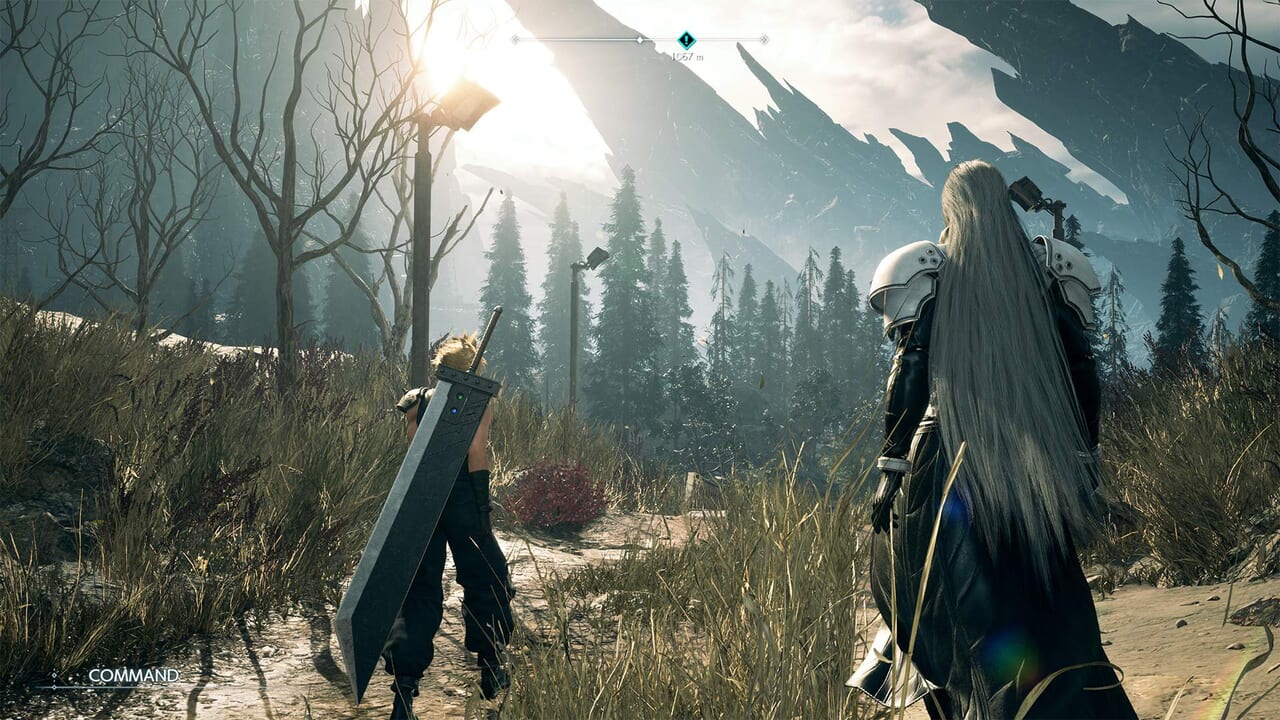
| 27 | After the battle, move forward to the platform and watch the cutscene. |
Temple of the Ancients Part 2
| 1 | After the cutscene, the party will split up. Cloud will have Tifa and Barret with him for this next section of the dungeon. |
|---|---|
| 2 | Use the rest stop nearby to restore the party’s HP and MP. Then, move forward. |
| 3 | Take out the enemies along the way while following the quest marker. |
| 4 | As you go further northeast, you will reach an open area with a chest on the side section just before the stairs leading down. Open this chest to get Jarngreipr (Tifa weapon). |
| 5 | Go down the stairs ahead. Follow the path by climbing down the vines. Then, shimmy along the narrow path by the wall to the next area. |
| 6 | In the area with the strong Lifestream winds, head west and take out the enemies ahead. Then, contain heading left to find a chest with Cosmotite Ore. |
| 7 | Backtrack to the area with the Lifestream winds. Wait for the winds to stop blowing before going forward. |
| 8 | Past the second gust of wind, head left to find large block you can push to act as a windbreak against the third gust of wind. |
| 9 | Move ahead and take out the enemies in the next area. From here, go up the vines to find more enemies to deal with. |
| 10 | Go forward and run past the section where the surrounding structures begin to collapse. |
| 11 | Head to the next room go right. Then, open the nearby chest to get Giga Potion x2. |
| 12 | Go to the next room and take out the SOLDIER enemies. |
Temple of the Ancients Part 3
| 1 | When you gain control of Aerith, you will have Yuffie and Red XIII in the party. |
|---|---|
| 2 | Use the rest stop if you need to. Then, enter the door ahead to the next area. |
| 3 | Read the tutorial on how to channel the Lifestream with Aerith. Then, approach the marked spot on the floor and stand on it. Aim up to the vessel above and use the left analog stick to channel the Lifestream energy to it. This will open the path to the next area. |
| 4 | Move forward and read the tutorial on absorbing Lifestream energy by taking down enemies or destroying crystals. |
| 5 | Head to the next room and take out the enemies there. Then, absorb Lifestream energy from the enemies and the objects in the area. |
| 6 | Use the energy you gathered to channel it to the two vessels in the middle. Doing so will mend the path that allows you to progress forward. |
| 7 | In the next area, go east toward the ancient structure. There is a chest here that contains Hi-Ether. |
| 8 | From here, you should backtrack to the mended ancient structure which has some stairs that lead to a lower area. |
| 9 | Go down the stairs and open the chest nearby to get Gambanteinn (Aerith weapon). Then, follow the main path to find 5 ancient vessels to channel Lifestream energy to. |
| 10 | Gather Lifestream energy here by praying. Then, go east and power the vessel there. |
| 11 | Go around to behind the ancient structure with water. Open the chest here to get Elixir. |
| 12 | Collect more energy from the nearby crystals before heading back to the vessels. Then, power the vessel positioned to the south. |
| 13 | Head to the next area by going south. Take down the enemies and break the crystals here to gather more Lifestream energy. Before going to the west room, head to the one to the southwest and open the chest there to get Sapphire. |
| 14 | Enter the room to the west and take down the enemies here. Then, head around to the room to the southeast to find more enemies to clear out. Before leaving, grab the Steadfast Block materia nearby. |
| 15 | Head back to the area with the vessels and power the one closest to the west. |
| 16 | In the next room, take out the monsters and break the crystals to gather more Lifestream energy. Head back to the vessel area again and power the one to the southeast. |
| 17 | From here, go up to the ancient tower that has now been mended. Take out the enemies along the way before going up the stairs. Open the chest here to get Cetran Armband (armor). |
| 18 | You will now have enough Lifestream energy for the last vessel. Head back to power it. |
Temple of the Ancients Part 4
| 1 | After you regain control of Cloud and his party again, take down the enemies that appear. |
|---|---|
| 2 | Head into the room ahead to catch sight of the Turks. Then, use the rest stop nearby if you need to before progressing. |
| 3 | Follow the quest marker. Then, watch the cutscene. |
| 4 | Afterwards, head right and set the large block towards the ledge to the northeast. Push it off to make a path to the next area appear. |
| 5 | In the next area, go forward and into the next building to get Battle Cry (Barret weapon) from the chest. |
| 6 | Go up the stairs and take out the enemies. Then, head up to another large block and push it off the ledge of the platform to progress. |
| 7 | Head up to the platform above. Then, walk south and jump down the ledge to get Circlet (accessory). |
| 8 | Go back up to the previous platform and approach the pillar. Press the L2 button to spin it. |
| 9 | When the Ironclad appears, your focus is to force it to knock the tower down by staggering it. Pummel Ironclad with Cloud’s Focused Thrust or Barret’s Focused Shot after the enemy uses Sharpen to easily build up its stagger gauge. |
| 10 | After the enemy knocks over the block, finish it off. |
| 11 | After the fight, approach the block and push it off to create a path across the gap. |
| 12 | Head on over the other side of the path. From here, make a left and open the chest to get Revival Materia Earrings (accessory). |
| 13 | Backtrack to the main path and take the passage on the right. In the next area, take out the enemies before opening the chest that has Mist Giga Potion. |
| 14 | Continue progressing to the next room and take down more enemies there. Afterwards, use the rest point further up the path to heal the party’s HP and MP. |
| 15 | Move forward and go right. Then, prepare to battle Rude and Reno. |
| 16 | Rude will still be weak to Wind while Reno is vulnerable to Fire. Equip the appropriate materia to be able to exploit each boss’ weakness to gain the advantage during the fight.
As with previous encounters with the Turks, Rude will be the more aggressive of the pair so fighting defensively with Cloud is a good way to take him down. Use counters while in Operator Mode while having Barret build ATB to bombard Rude with Focused Shot or Wind magic to build up his stagger gauge. For Reno, just watch out for his counterattacks and try baiting him to attack first to counter him yourself. Build up his stagger gauge with fire spells and moves like Focused Thrust or Focused Shot and he should go down without much trouble at this point. |
Temple of the Ancients Part 5
| 1 | Once you regain control of Aerith’s party, head forward to the next area while gathering Lifestream energy along the way. |
|---|---|
| 2 | Use the rest stop if you need to. Then, go through the door on the right. In this room, continue accumulating Lifestream energy and pick up Subversion materia by the door. |
| 3 | Use the energy you gathered to power the vessel back at the previous area. |
| 4 | From here, take out the enemies on the right side of the area. Then, move across to the left side by jumping over the gap. |
| 5 | Go inside the building and open the chest ahead to get Brisingamen (Red XIII weapon). |
| 6 | Go further to the left to find more enemies to take down. At the end of the long path west, go inside the room ahead and deal with more enemies there. Then, open the chest nearby to get Cetran Armlet (armor). |
| 7 | From here, follow the path that thrusts north and kill the enemies here. |
| 8 | With no more enemies disrupting the vessels from being channeled with energy, backtrack to the main platform. Before doing so, head left and go around the platform there to get Astral Material from the chest. |
| 9 | Backtrack to the central platform and use the rest spot if you need to. Remember to absorb the Lifestream energy around the area before progressing further to the upcoming boss fight to help Aerith in the battle. |
| 10 | Head down the stairs and prepare to battle Elena and Tseng. |
| 11 | Tseng is weak to ice while Elena will still be vulnerable to Lightning. Elena is dealt the same way as you did in earlier encounters with her so just unload on her with lightning magic and abilities.
Tseng, meanwhile, should be approached defensively as he will often force his damage onto you with relentless attacks. You can try switching to Red XIII to counter his strikes to build up Vengeance or have Aerith simply fight at a distance using doublecast ice magic after setting up Arcane Ward. There are very few opportunities to attack Tseng safely so be patient and wait for him to end his assault before retaliating. Be prepared to heal a lot in this fight, especially given Aerith’s low HP and physical defense. Do not forget to use Limit Breaks as well when either boss is staggered to help you close out the fight. |
| 12 | After the battle, watch the cutscene. |
Temple of the Ancients Part 6
| 1 | Once the party is reunited, move forward and take the elevator up to the next area. |
|---|---|
| 2 | Go through the large door ahead and talk to Tseng. Then, approach the altar in the middle of the room. |
| 3 | The next sections simply require you to clear a trial for each party member. These are simple enough so just go through each of them to progress to the next section of the dungeon. |
| 4 | After clearing all trials, watch the cutscene. Then, move forward and head down the stairs. Take out the enemies in the next area where you can head to the path on the left or right. Choose the one on the right first which leads to more enemies. Once the monsters are dealt with, open the nearby chest to get Cetran Bracer (armor). |
| 5 | Backtrack to the previous area and take the left path. In the small room is a chest with Fuma Shuriken (Yuffie weapon). |
| 6 | Move forward again and take out the enemy along the way. Then, go inside the room ahead and go up the raised platform to get X Potion from the chest. |
| 7 | Move along the path ahead to reach another set of stairs. Before heading down, move up to the end of the path to find a chest with Elixir. |
| 8 | Return to the stairs and head down. Then, watch the cutscene. |
| 9 | Afterwards, go inside the room ahead and take down the enemies that appear. |
| 10 | Continue moving deeper into the dungeon through the rooms while taking down more enemies along the way. |
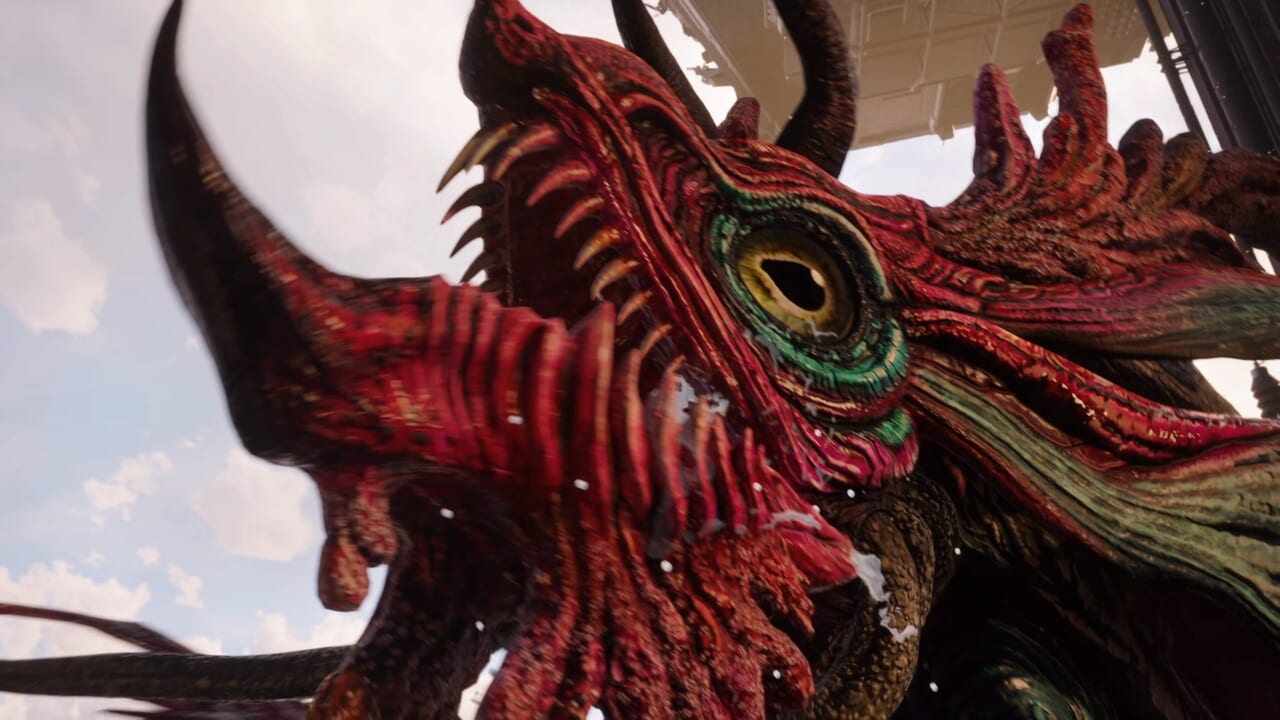
| 11 | Use the rest stop before proceeding further. Then, move forward and prepare to battle Demon Gate. |
| 12 | Demon Gate is not weak to any particular element so just equip your strongest magic materia to be able to hit the boss from a distance.
Start the fight by building up the boss’ stagger gauge using abilities and magic. When Demon Gate’s HP drops to about half, it will call forth another gate to the fight. Demon Gate will eventually use Encroach to reduce the area you are able to move around safely in the arena. Pummel it with abilities and doublecast magic to prevent it from doing so. Do not hesitate to throw out Limit Breaks and Synergy Abilities just to interrupt the boss’ ability to shrink the battlefield’s area as you will have less spots to position yourself at for avoiding its attacks as the fight progresses. |
| 13 | Once the boss is defeated, move forward for a cutscene. |
| 14 | Exit the temple with Vincent. |
| ← Ch. 12: A Golden Key | Ch. 14: End of the World → |
Final Fantasy 7 Rebirth Recommended Article List
FF7 Rebirth Chapter Walkthroughs
 Final Fantasy 7 Rebirth All Chapter Walkthroughs List
 Ch. 1: Fall of a Hero
 Ch. 2: A New Journey Begins
 Ch. 3: Deeper into Darkness
 Ch. 4: Dawn of a New Era
 Ch. 5: Blood in the Water
 Ch. 6: Fool's Paradise
 Ch. 7: Those Left Behind
 Ch. 8: All that Glitters
 Ch. 9: The Planet Stirs
 Ch. 10: Watcher of the Vale
 Ch. 11: The Long Shadow of Shinra
 Ch. 12: A Golden Key
 Ch. 13: Where Angels Fear to Tread
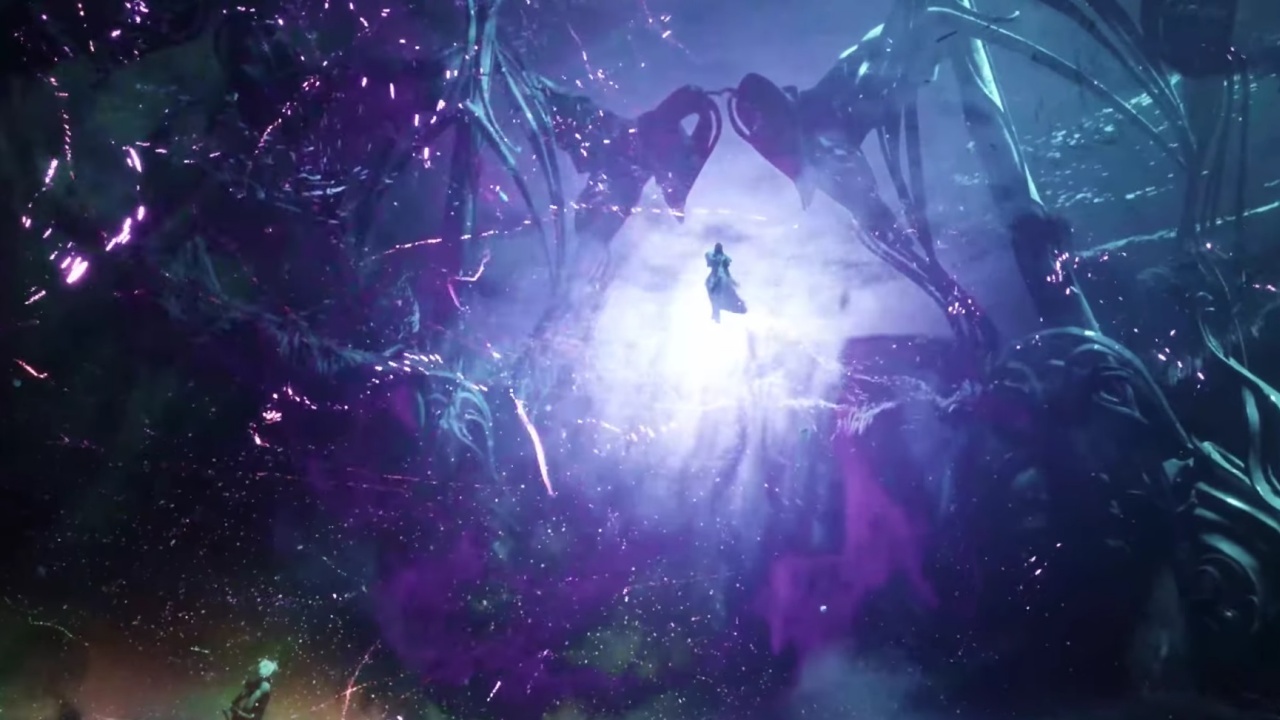 Ch. 14: End of the World
FF7 Rebirth Side Quests (Odd Jobs)

Chapter 2 Side Quests
| ▼FF7 Rebirth Chapter 2 Side Quests | |
|---|---|
| Flowers from the Hill | Livestock’s Bane |
| Lifeline in Peril | Where the Wind Blows |
| A Rare Card Lost | |
Chapter 4 Side Quests
| ▼FF7 Rebirth Chapter 4 Side Quests | |
|---|---|
| Stuck in a Rut | When Words Won’t Do |
| The Hardest Sell | Dreaming of Blue Skies |
| Calling All Frogs | |
Chapter 7 Side Quests
| ▼FF7 Rebirth Chapter 7 Side Quests | |
|---|---|
| The Saga of the Seaside Inn | Rendezvous in Costa del Sol |
| Bodybuilders in a Bind | Of Robed Men and Ransoms |
Chapter 9 Side Quests
| ▼FF7 Rebirth Chapter 9 Side Quests | |
|---|---|
| Missing: Mr. Birdie | The Pursuit of Perfection |
| O Chicken, Where Art Thou | Teach Me, Great Warrior |
| The Spice of Life | |
Chapter 10 Side Quests
| ▼FF7 Rebirth Chapter 10 Side Quests | |
|---|---|
| Bonds of Trust | Absence of a Sign |
| From Whence Life Flows | Promises to Keep |
Chapter 11 Side Quests
| ▼FF7 Rebirth Chapter 11 Side Quests | |
|---|---|
| Esoteric Secrets of the Elders | My White-Haired Angel |
Chapter 12 Side Quests
| ▼FF7 Rebirth Chapter 12 Side Quests | |
|---|---|
| Hustle and Grind | Beneath Still Waters |
| Tides of War and Worry | Gold Cup or Bust |
| Trouble in Paradise | Sand and Circuses |
| Escape from Endless Writer’s Block | Woodland Vigil |
| Victim of Circumstance | Lament of the Damned |
| Can’t Stop Won’t Stop | |
FF7 Rebirth Strategy Guides

Beginner Guides
| ▼FF7 Rebirth Beginner Guides | |
|---|---|
| Game Controls | Game Difficulty |
| Beginner's Guide: Things to Do First | Best Gameplay Settings |
| Battle System Guide | Permanent Events and Missables |
| Characters List | Stats and Attributes Guide |
| Status Effects List and Guide | How to Recover HP and MP |
| How to Save | How to Fast Travel |
| How to Upgrade Weapons | How to Unlock Skill Cores |
| How to Increase Weapon Ability Slots | How to Unlock Weapon Abilities |
| How to Tame Chocobos | How to Ride Chocobos |
| How to Change Party Members | |
Useful Guides
Relationship Guides (Bonds of Friendship)
| ▼FF7 Rebirth Relationship Guides | |
|---|---|
| Aerith Intimate Date Guide | Tifa Intimate Date Guide |
| Barret Intimate Date Guide | Red XIII Intimate Date Guide |
| Yuffie Intimate Date Guide | |
Chocobo Mounts Guides
FF7 Rebirth Collectibles and Locations Guides
 Final Fantasy 7 Rebirth All Collectibles List and Guide
FF7 Rebirth Boss Guides

| ▼FF7 Rebirth Boss Guides | |
|---|---|
 Materia Guardian Materia Guardian |
 Terror of the Deep Terror of the Deep |
 Phoenix Phoenix |
|
FF7 Rebirth Mini Game Guides

| ▼FF7 Rebirth Mini Game Guides | |
|---|---|
 Chocobo Racing Chocobo Racing |
 Queen's Blood Queen's Blood |
 Moogle Mischief Moogle Mischief |
 3D Brawler 3D Brawler |
 Piano Mini Game Piano Mini Game |
 G-Bike G-Bike |
 Johnny's Seaside Inn Johnny's Seaside Inn |
 Junon Parade Junon Parade |
 Dolphin Course Dolphin Course |
 Desert Rush (Whack-a-Box) Desert Rush (Whack-a-Box) |
 Run Wild (Soccer) Run Wild (Soccer) |
 Pirate's Rampage Pirate's Rampage |
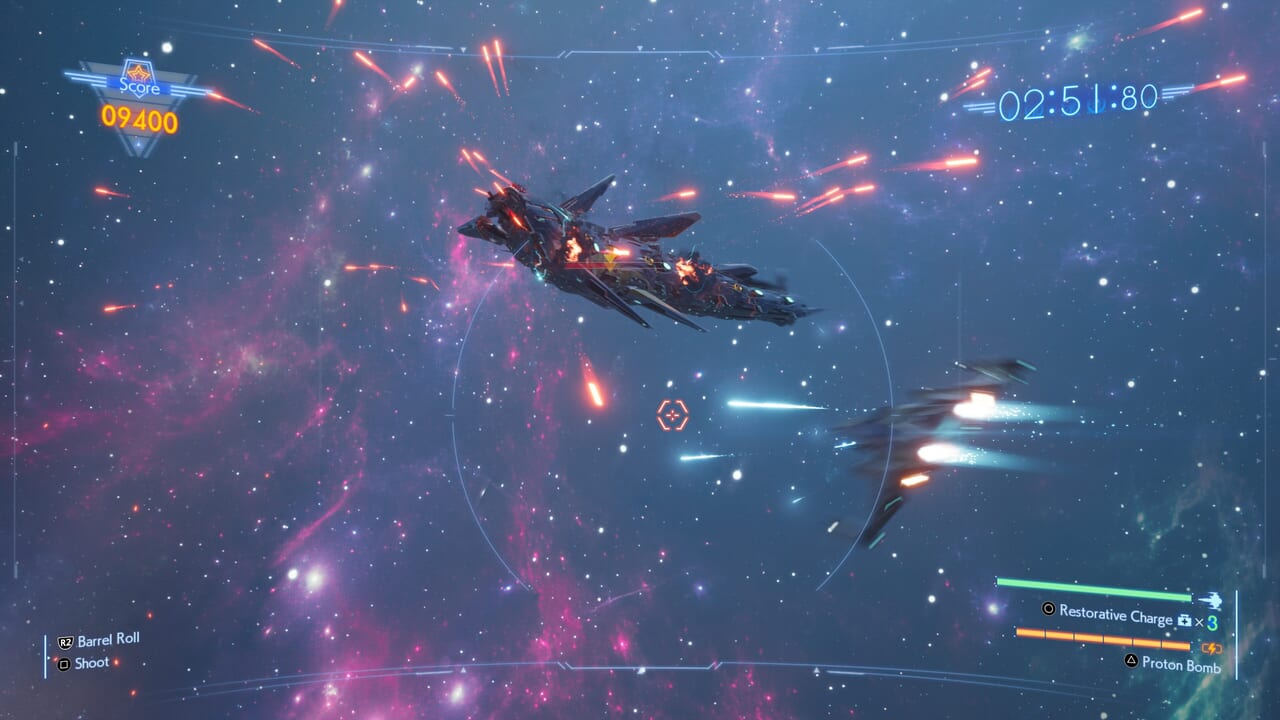 Galactic Saviors Galactic Saviors |
|
FF7 Rebirth Summon Guides

New Summons
| ▼FF7 Rebirth New Summons | |
|---|---|
Returning Summons
| ▼FF7 Rebirth Returning Summons | |
|---|---|
FF7 Rebirth Game Database

Equipment
| ▼FF7 Rebirth Equipment Database | |
|---|---|
Materia
| ▼FF7 Rebirth Materia Database | |
|---|---|
Skills and Magic
| ▼FF7 Rebirth Skills and Magic Database | |
|---|---|
| Weapon Abilities | Limit Breaks |
| Synergy Abilities | Synergy Skills |
| Magic | Summons |
FF7 Rebirth Characters

Playable Characters
| ▼FF7 Rebirth Playable Characters | |
|---|---|
Non-Playable Characters
| ▼FF7 Rebirth Non-Playable Characters | |
|---|---|
FF7 Rebirth Pre-Release Information

FF7 Rebirth Demo Walkthrough and Guides

Demo Walkthroughs
| ▼FF7 Rebirth Demo Walkthroughs | |
|---|---|
 Demo Part 1: Nibelheim Demo Part 1: Nibelheim |
 Demo Part 2: Junon Demo Part 2: Junon |
Demo Boss Guides
| ▼FF7 Rebirth Demo Boss Guides | |
|---|---|
| Materia Guardian |
Terror of the Deep |
| Phoenix |
|
Demo Useful Guides
FF7 Rebirth Game Forum

| ▼FF7 Rebirth Game Forum | |
|---|---|
| Chat Board | Question Board |
| Bug Report Board | |
Other FF7 Game Walkthroughs

| ▼FF7 Game Guides | |
|---|---|
| Final Fantasy 7 | Final Fantasy 7 Remake Intergrade |
| Crisis Core: Final Fantasy 7 Reunion | |
Leave a Reply