

Cysloden – Riville Prison Tower Walkthrough
This is the main story walkthrough and strategy guide for Cysloden – Riville Prison Tower in Tales of Arise. Included also are lists of playable characters, obtainable items and collectibles, and normal and boss enemies.
Characters
Here are the playable characters in this walkthrough:
| Character | Availability |
|---|---|
| Alphen |
All Locations |
| Shionne |
All Locations |
| Rinwell |
All Locations |
| Law |
All Locations |
Obtainable Items
Here is a list of items obtainable in this walkthrough:
| Item | Location |
|---|---|
| ? |
Normal Enemies
Here is a list of enemies encountered in this walkthrough:
| Enemy | Level | Type | Location |
|---|---|---|---|
| ? |
Boss Enemies
Here is a list of boss enemies encountered in this walkthrough:
| Boss | Level | Type | Location |
|---|---|---|---|
| Ooze Hive | 17 | ||
| Ganabelt | 19 |
Cysloden – Riville Prison Tower Walkthrough
Please note that this walkthrough is still undergoing updates.
Cysloden
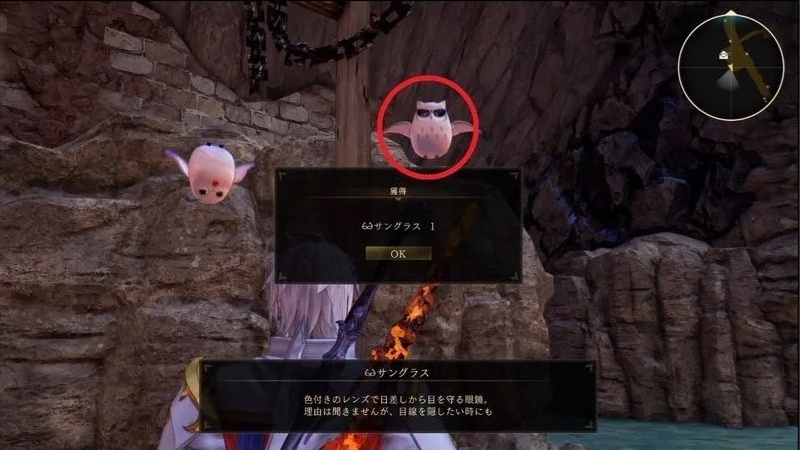
| 1 | Move forward toward the market and look to the lampost to your right to find Owl #13. |
|---|---|
| 2 | Afterwards, head to Cysloden Fountain Plaza and move toward the marked destination for a cutscene. |
| 3 | Next, head to Central Plaza Avenue to the north for another cutscene. Afterwards, return to the Silver Swords Hideout and you will come to the Underground Waterway. |
Underground Waterway
| 1 | Head for the marked destination ahead. Open the chest along the way to get 1300 Gald. Further along the path is a man you can heal with Shionne. Go left to find a chest with Onyx Cloak x1. |
|---|---|
| 2 | Head north going to the ladder. Jump the gap by the ladder to get Orange Gel x1. Afterwards, drop down and follow the path to some enemies. Take them out and pick up Peach Gel x1. |
| 3 | From here, drop down to your right to get Treat x1 in a chest. |
| 4 | As you near the next boss, you will find a merchant. Feel free to transact with him and get the healing light nearby. |
| 5 | Move forward and prepare to battle Ooze Hive. |
| 6 | You can try to take out the Ooze Hive’s minions first while keeping the Ooze Hive in view to make the fight more manageable. Note that the boss will simply summon them back again after awhile, so you may want to focus on bursting down the boss with artes and stringing together combos to trigger Boost Strikes. |
Cysloden Central Plaza
| 1 | After defeating the Ooze Hive, head outside and watch the cutscene. Then, proceed ahead and take out the enemies along Cysloden Central Plaza. |
|---|---|
| 2 | Afterwards, head to Riville Prison Tower through the exit. |
Riville Prison Tower
| 1 | Examine the elevator on the first floor of the tower. Afterwards, head to the south wing and break the wall there. |
|---|---|
| 2 | Head to the room to the southwest and talk to the officer there. |
| 3 | Head to the southeast room to get the key. Then, head back to the main hall and use the key to open the east door. |
| 4 | Check the back of the desk inside the office. Then, head to the north door of the entrance hall. Examine the desk to the northeast to get the elevator key. |
| 5 | Use the key to operate the elevator and reach the 2F of the tower. |
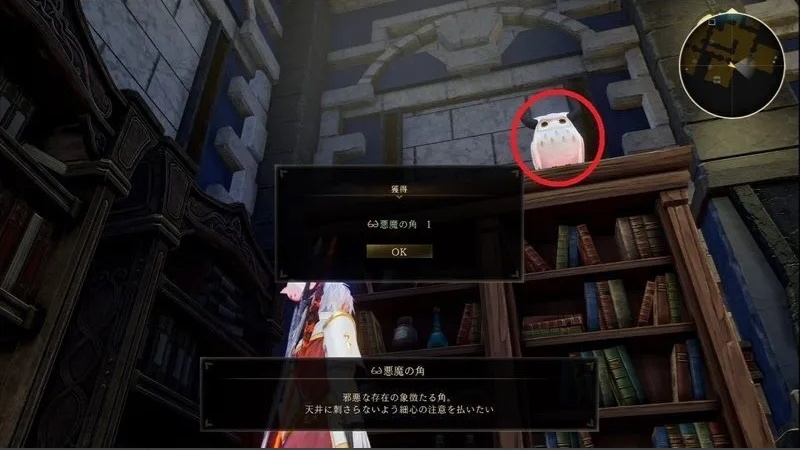
| 6 | Head to the southeastern room and operate the elevator control panel. Check the bookshelf to find Owl #14 Afterwards, go west and use the elevator to reach the 3F. |
| 7 | Prepare to battle Ganabelt. Rinwell becomes very useful for this fight as she can interrupt Ganabelt when he winds up his attacks. Have Kaw use boost attacks as well to destroy Ganabelt’s shield. When you have reduced his HP to about half, he will move to the center of the area and begin casting Indignation. Take out the 3 illusions he summons to interrupt him and pummel him with artes and boost strikes. |
| << Messia 224 – Nevira Snowplains | Frozen Valley – Overseer Hill >> |
Item Locations
Below are the in-game locations of the obtainable items in this walkthrough:
Coming soon.
Owl Locations
Below are the in-game locations of all owls in this walkthrough:
| Owl | Map | In-game |
|---|---|---|
| #13 (Cysloden Market) | 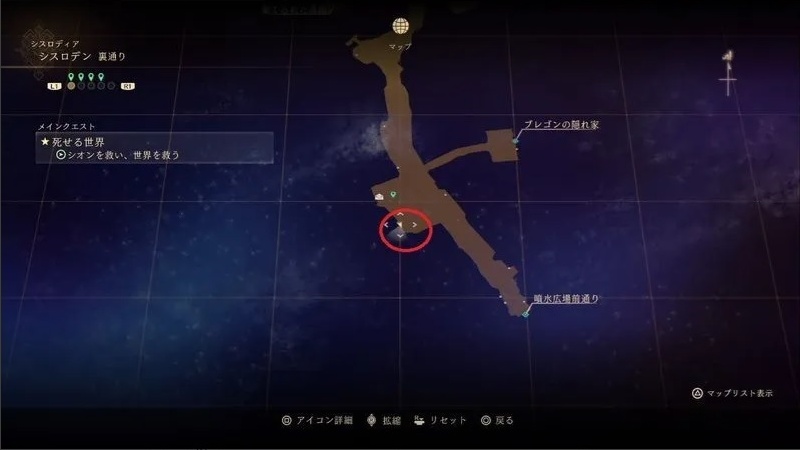 |
 |
| #14 (2F Riville Prison Tower) | 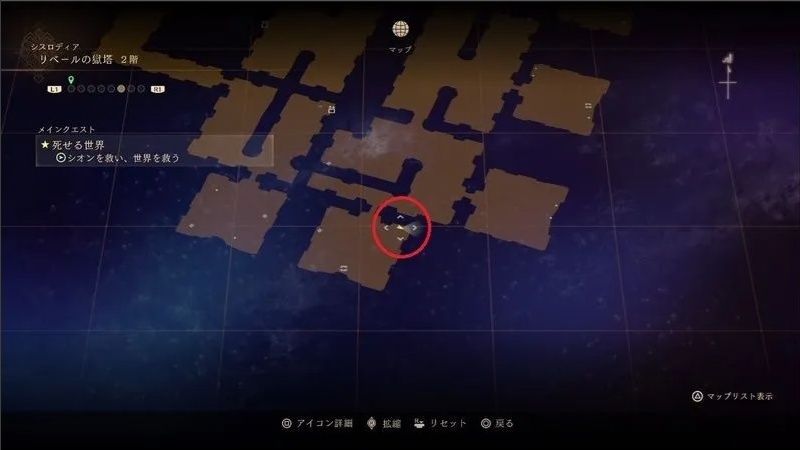 |
 |
Explored Locations
Coming soon.
Leave a Reply