

Ulvhan Grotto – White Silver Plains Walkthrough
This is the main story walkthrough and strategy guide for Ulvhan Grotto – White Silver Plains in Tales of Arise. Included also are lists of playable characters, obtainable items and collectibles, and normal and boss enemies.
Characters
Here are the playable characters in this walkthrough:
| Character | Availability |
|---|---|
| Alphen |
All Locations |
| Shionne |
All Locations |
Obtainable Items
Here is a list of notable items you can obtain in this walkthrough:
| Item | Location |
|---|---|
| Astral Flower x1 | Ulvhan Grotto (after defeating the Boisterous Roper) |
| Onyx Mail x1 | Ulvhan Grotto (inside a chest where the Boisterous Roper was standing). |
| Vegetable Soup Recipe | White Silver Plains (after reaching the Highland Cabin). |
Normal Enemies
Here is a list of enemies encountered in this walkthrough:
| Enemy | Level | Type | Location |
|---|---|---|---|
| Wolf | 7 | Kyrd Garrison | |
| Armadillo | 7 | Kyrd Garrison, Lacerda Cliffs | |
| Bee | 8 | Kyrd Garrison, Lacerda Cliffs | |
| Roper | 14 | Ulvhan Grotto | |
| Deceptive Effigy | 14 | Ulvhan Grotto | |
| Boisterous Roper (gigant) | 15 | Ulvhan Grotto | |
| Ice Wolf | 12 | White Silver Plains | |
| Alpha Ice Wolf | 14 | White Silver Plains | |
| Hawk | 13 | White Silver Plains | |
| Berserker | 15 | White Silver Plains |
Boss Enemies
There are no bosses encountered in this section of the game.
Ulvhan Grotto – White Silver Plains Walkthrough
Please note that this walkthrough is still undergoing updates.
Check Out the Gates of Fire
Ulzebek – Castle Gates – Trench of Flames
| 1 | Feel free to begin some quests in Ulzebek before heading to the Gates of Fire. You can talk to the Handsome Nobleman to initiate Shionne the Fashion Critic Sub Quest and Dyron to begin The Hunt for New Arms. |
|---|---|
| 2 | When you are ready, head to head to the northeast exit for a cutscene. |
| 3 | Exit to Kyrd Garrison and use the elevator on the north side to travel to the Castle Gates – Trench of Flames. |
| 4 | Move forward towards the main entrance directly north and enter 1F Glanymede Castle. |
1F – Glanymede Castle – Gates of Fire
| 1 | Afterwards, go all the way east to exit to East Side – Trench of Flames. |
|---|---|
| 2 | Cross the tube and go up the ladder. Then, walk southeast following the tracks. |
| 3 | Continue east past the arc to the Gates of Fire and watch the cutscene. |
Find Doc in Mosgul and Ask About the Medicine – Find the Medicine in the Kyrd Garrison Guardhouse
Ulzebek – Mosgul – Kyrd Garrison
| 1 | Fast travel to Mosgul and talk to Doc at his shack just ahead. Watch the cutscene. |
|---|---|
| 2 | At Kyrd Garrison, head to the outpost to the south and check the shelf near the bed to find the medicine. |
Show Doc the Medicine – Exit the Gates of Fire and Head to Cyslodia
Mosgul – Ulzebek – Gates of Fire – Trench of Flames
| 1 | Head back to Mosgul and talk to Doc. |
|---|---|
| 2 | Afterwards, go back to the Crimson Crows’ hideout in Ulzebek for a cutscene. Afterwards, Zephyr will join your party. |
| 3 | Move forward to the exit to reach Lacerda Cliffs. |
Exit the Gates of Fire and Head to Cyslodia
Lacerda Cliffs
| 1 | Go to the southeast end of the area to find some vines you can use to climb down. Open the chest to find Life Bottle x1. |
|---|---|
| 2 | Afterwards, go northeast to reach a fork. Take the path going northeast and until the path splits between an upper (left) and lower path (right). Take the lower path (right) and keep following it for a cutscene. Then, defeat the enemies (Bees x3) to save the Owl. |
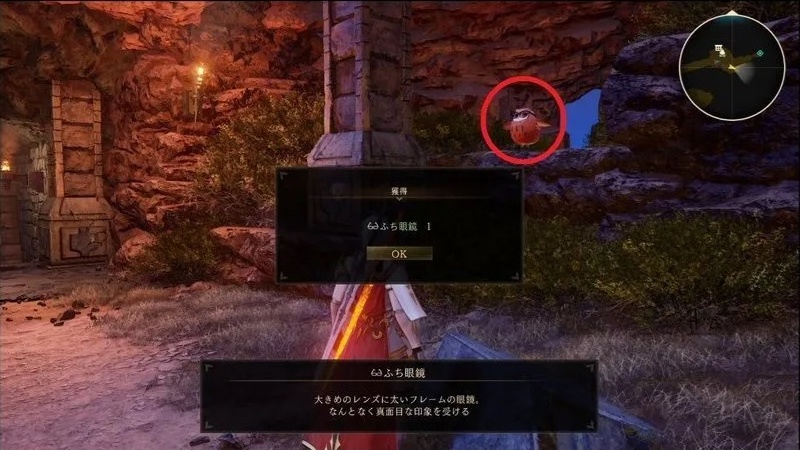
| 3 | Watch the cutscene. Afterwards, continue going northeast to reach a camping spot and a merchant. Immediately to your right is Owl #9 standing on a ledge. |
| 4 | Stop the camping spot to rest. Then. enter Ulvhan Grotto. |
Ulvhan Grotto
| 1 | Go up the stairs for a cutscene. Afterwards, follow the marked destination going east while defeating the enemies along the way. |
|---|---|
| 2 | A cutscene will play along the way. Afterwards, go up the ladder and follow the straight path northwest which eventually bends north. |
| 3 | The path will split afterwards, one going southeast and the other going northeast. Take the northeast one and follow it as it goes east. You will find a chest along the way with Panacea Bottle x3. Continue following the path as it turns southeast and you will be able to drop down to the lower area. |
| 4 | Follow the path forward to find the Boisterous Roper gigant accompanies by Roper x2. The gigant should not be hard to beat. Focus on taking down the Ropers first before focusing on the boss. Boisterous Roper mainly uses sweeping attacks with its tentacles which you can avoid by timing your dodge at the right moment. It will also occasionally send out balls of slime that will damage you upon contact, though these are quite easy to run away from. |
| 5 | Focus attacks on the weak point on its head and pull back for Shionne to heal you if your HP is low. After defeating the Boisterous Reaper, you will get Astral Flower x1. |
| 6 | Just behind where the gigant zeugle was standing is a chest containing Onyx Mail x1. |
| 7 | Go southwest and take the ladder south to go down and swim to the northeast side. |
| 8 | Continue going northeast and go up the stairs to the exit to White Silver Plains. |
Procced through the White Silver Plains
White Silver Plains
| 1 | Follow the straight path going northeast. When the path splits, take the path going left. The path on the right is actually a shortcut leading to a hill to jump down from. |
|---|---|
| 2 | After taking a left at the first split, follow it to another split. Go left to find a chest with 850 gald. |
| 3 | Backtrack to the previous fork and take the path going right. Follow it east and as it eventually bends south (if you too the shortcut on the right, you will end up here immediately). Approach the cabin for a cutscene. Afterwards, read the tutorial on accessories. |
| 4 | Watch the cutscene. Then, you will get Vegetable Soup Recipe. |
| 5 | Continue east past the cabin and head for the southeast corner of the area to find some red vines you can drop down from. Do so to find a chest with Life Bottle x1. |
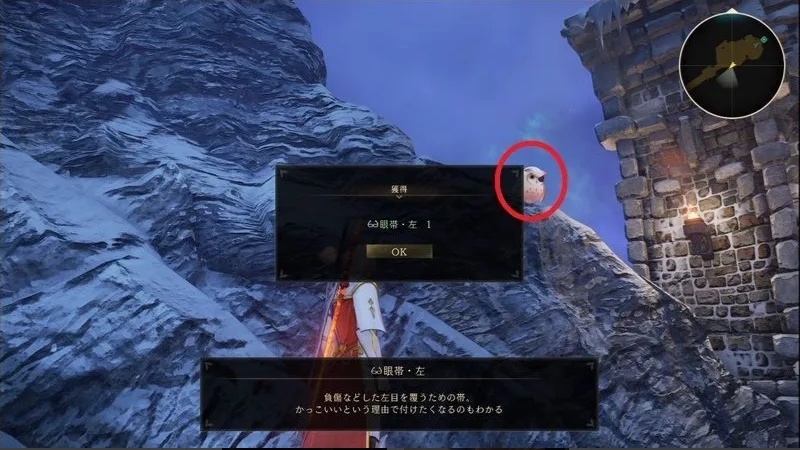
| 6 | Climb up back the vines and start heading for the marked destination to the northeast for a cutscene. Afterwards, head northeast from the entrance to Messia 224. You will find Owl #10 by the bridge there. |
| 7 | Enter Messia 224. |
| << Kyrd Garrison – Glanymede Castle | Messia 224 – Nevira Snowplains >> |
Item Locations
Below are the in-game locations of the obtainable items in this walkthrough:
Coming soon.
Owl Locations
Below are the in-game locations of all owls in this walkthrough:
| Owl | Map | In-game |
|---|---|---|
| #9 (Lacerda Cliffs) | 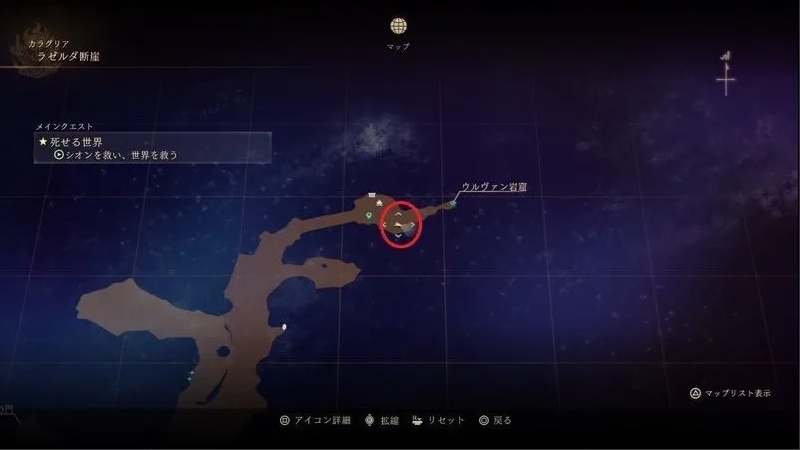 |
 |
| #10 (White Silver Plains) | 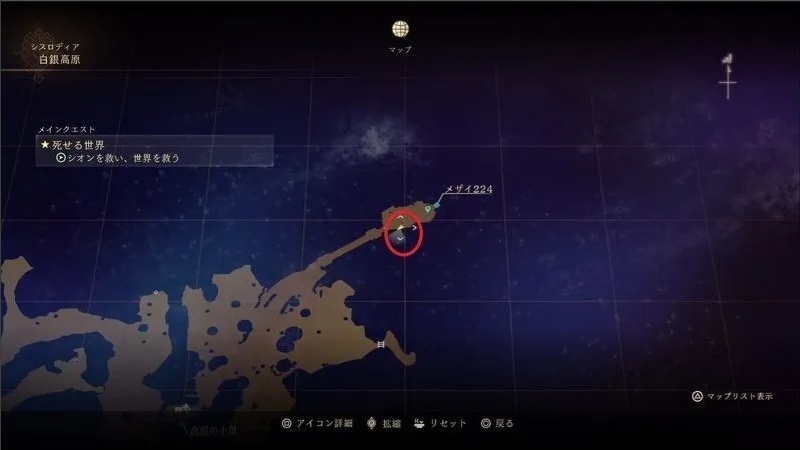 |
 |
Explored Locations
Coming soon.
Leave a Reply